|
||||
|
||||
|
||||
|
Every amateur filmmaker knows this: the camcorders are getting smaller and lighter, which is good for transport, but means that the images are becoming increasingly blurred because it is becoming increasingly difficult to hold the cam steady due to the lack of mass. The image stabilizer built into the cam provides a little help. However, this can usually only be activated, so it only knows on and off and does not offer any fine adjustment. Of course, a tripod can bring the necessary calm to the pictures, but in some situations a tripod is too unwieldy or inflexible, or there is simply no space. At such moments it can happen that the recordings become almost unsightly - especially in the zoom range - because it is simply impossible to hold the cam reasonably still. If the built-in image stabilizer is no good, all that remains is post-processing on the computer. I would like to present such a computer-based solution here. And the best thing about it: It's also free, since the required program including the plug-in is freeware! Let's come to the original file first: A little sheep that still has problems with the ladder out of the hut. In this case, a tripod was too inflexible, since the sheep are constantly running back and forth and you are forced to constantly change your position. You can't get too close either, as the animals are naturally shy. So you kind of have to "shoot from the hip" and that too in a strong zoom range. You can see the shaky result here: |
||||
|
|
||||
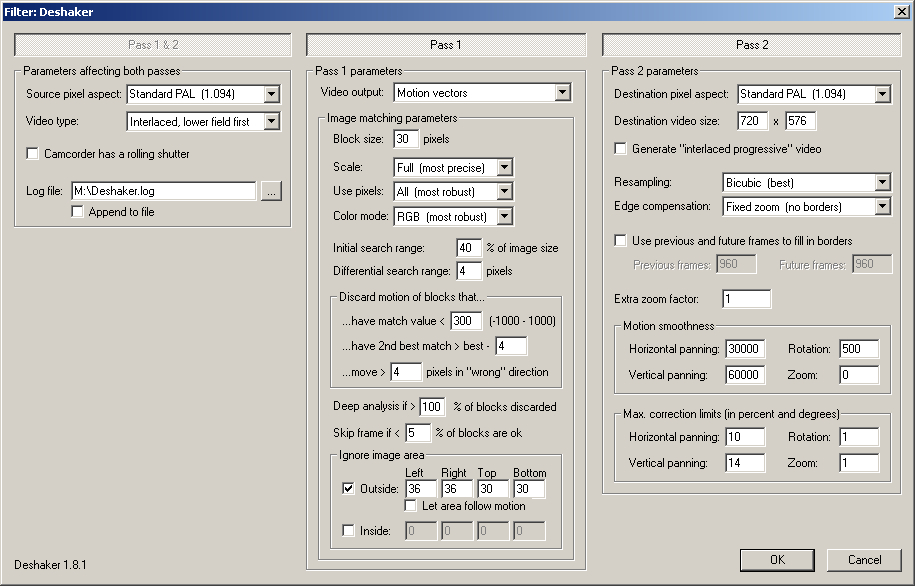
The required software: VirtualDub and the Deshaker plug-in. VirtualDub is a free, simple video editing program. All previously released versions are available here: First you open the corresponding AVI file under "/File/Open video file.../." If an error message appears at this point in the form: "Could not locate Decompressor dvsd", then no suitable DV codec is installed and you have to install a DV codec afterwards. A free codec is the Panasonic DV codec, which is the icing on the cake with the Microsoft codec. If you have installed a DV codec, the file opens in two windows. The left window is the so-called INPUT window. In this you can see the original file without editing from the hard drive. The right window is therefore the OUTPUT window. Here you can see the finished result. With not too complex edits and enough Computing power even in real time. In the case of the Deshaker plugin: Don't get your hopes up. On a 3.2 GHZ AMD you are still a long way from real-time, which is no wonder given the amount of computing work involved. After all, we are talking about a program that tries to analyze the image material in such a way that it recognizes what panning, what movement of an object and what is shaking in the existing image material. And I have to say, I'm always surprised how well it recognizes every file! So, we opened the file and found that our screen with a resolution of 1024x768 pixels is too small. We only see half of the output file. If you don't have a TFT with a vertical resolution of at least 1440 pixels, the same applies to you. So we adjust our input and/or output window by right-clicking on it and selecting 1/2 or 1/4 size. A little tip: I would only make the input window smaller, because after all you want to see what comes out at the end. Next, we choose the compression in which the file is to be saved later. Normally you use the installed DV codec. In our case the Pansonic DV codec. VirtualDub does not set a codec by default but "uncompressed" and also reports this with a warning before saving that a very, very large file will be saved without compression. So we go under /Video/Compression.../ and select our DV codec in the following window. Now under "Video" on "Filters..." and then on "Add..." and select Gunnar Thalin's Deshaker plug-in. The settings window opens. You can make the settings using the following screenshot. These are standard settings that produce good to very good results for most recording situations. It should be noted that the settings under Pass2 can only be made if you click on the button of the same name. But don't forget to click on Pass 1 again after entering the numerical values. The Deshaker plug-in works in two passes. Pass 1 analyzes the video material and decides what is movement, trembling, panning, ect. It saves the results in a log file. Where this file is saved, you can see links under Pass 1 & 2 set. A little tip: I would select the same directory as the storage location as the open AVI file, so everything stays together and no file garbage accumulates. As said, these are default settings. If you want to go into more detail, I refer you to the instructions here. Only the settings under "Ignore Image area" I recommend playing around, because they contain a great feature. You can use it to define areas that are not used for the evaluation. Which can sometimes be very helpful. For example, if you take a picture of the sea with a sandy beach in the foreground, it could happen that the Deshaker plug-in adjusts to the sea and thus bobs up and down evenly. By excluding this area from the evaluation, you may still be able to achieve good results. |
||||
|
||||
|
Deshaking Settings Window (click to enlarge) |
||||
|
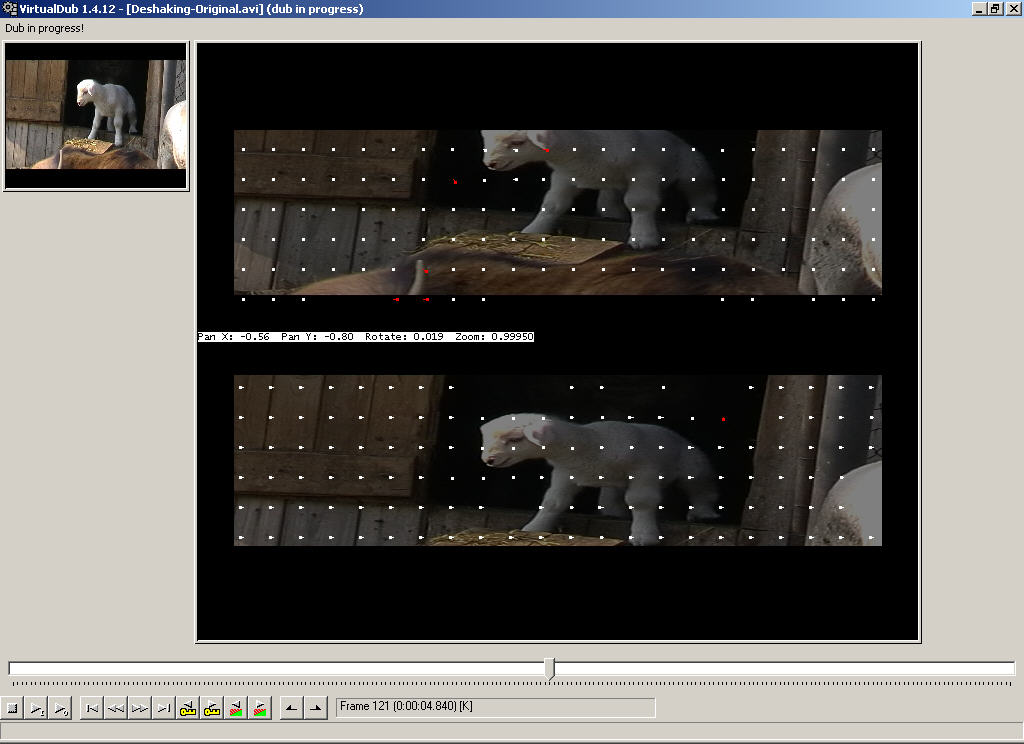
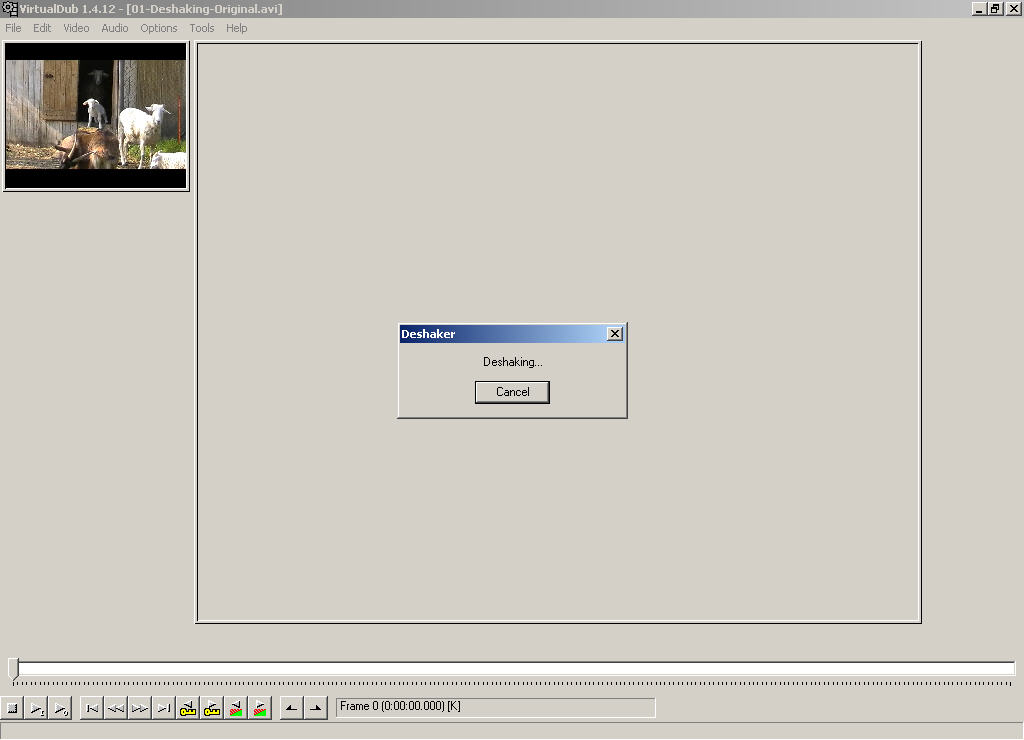
After you have adjusted everything and activated Pass 1 again, close the Deshaker window and the VirtualDub plug-in window by clicking on OK. Now you have to make sure that the slider above the play button with which you can "scrub" can also be located on the far left at the beginning of the file. If not, click the left arrow bar and VirtualDub will jump to the beginning of the file. Since you are on the far left, you start the first pass (pass 1) of the Deshaker plug-in by clicking on the play button with the small O (O for output), i.e. the so-called "Output Playback". Depending on the size of the file, you now have to wait, wait, wait. |
||||
|
||||
|
|
||||
|
||||
|
Now we have to wait again, but usually not as long as with Pass 1. The Deshaking plug-in now calculates the image stabilization based on our settings. Once the calculation is complete, we can look at the result by clicking on the Output Playback button, which then looks something like this: a quietly standing sheep with a dancing, black frame around it. As I said, a 3.2 GHz computer cannot produce smooth playback, so for a more precise evaluation it is essential to save our video once and examine the result in the media player. To do this, go to "File/Save as Avi...", select the name and click on Save. Then you open the saved file with a double click in the media player. |
||||
|
|
||||
|
The sheep now stands like a one, which is a 1000 percent improvement compared to the original file. A little thing that mars the enjoyment of the film, however, is this frantically dancing, black frame. In order to get rid of that, we unfortunately have to accept a small deterioration in the film quality, as we are forced to zoom in on the video until the black border disappears entirely. Here you can see that the more you wobble, the more you have to zoom in afterwards and the worse the quality of the new video gets. |
||||
|
|
||||
|
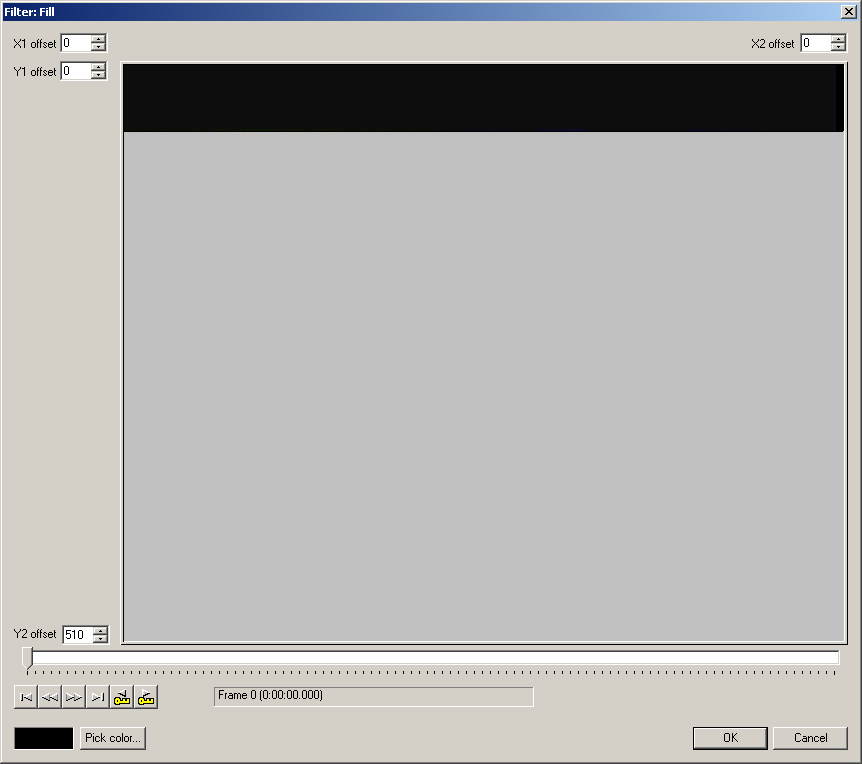
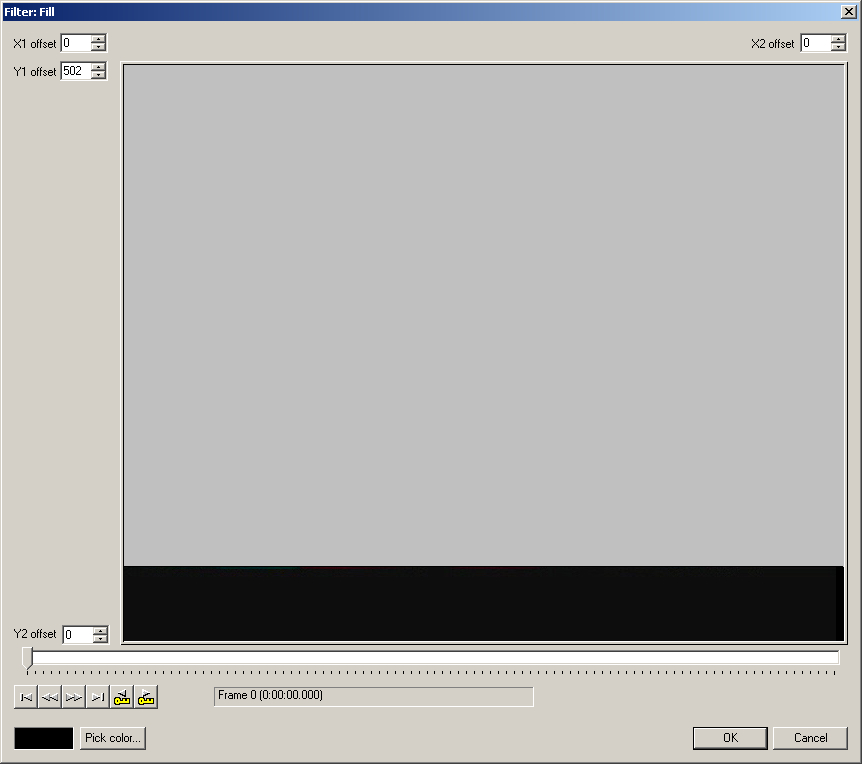
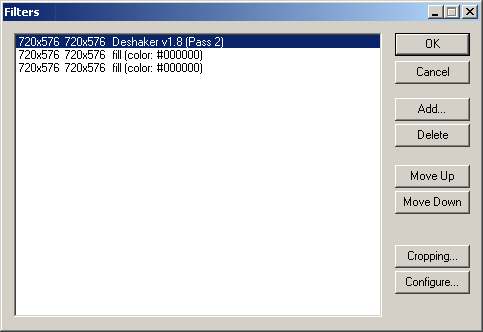
It is striking that although there are no more beams to be seen on the left and right, there are still some dancing above and below. The explanation is simple: Anyone who still remembers the original file saw that it has black bars at the top and bottom because I had activated the pseudo 16:9 mode on my camcorder. Since black bars are of course completely useless for motion detection, I also excluded them from the calculation (we remember: with Pass 1 you can specify an area that is not used for motion detection). Therefore, the Deshaker plug-in only zoomed in as far as I provided image material for the calculation. The solution is simple: We simply add the black bars at the top and bottom again and thus cover the dancing bars. The filter for this in VirtualDub is called (how could it be otherwise?) "fill". Fill is actually there to create an arbitrarily large, colored rectangle at an arbitrary position in the video. We want to create two rectangles, one at the top and one at the bottom, colored black. To do this, we have to insert the filter twice, below the Deshaker plug-in. It will look like this: |
||||
|
||||
|
To test the size of the black bars from the original file, I simply opened VirtualDub again, loaded the original file with the black bars and used the "fill" approached the same until I had the values. Funnily enough, my camcorder has two bars of different sizes. Or you can also see it in such a way that he does not place the visible image area exactly in the middle. Here are my values: |
||||
|
||||
|
Well, that's it and I think the result is impressive. A very shaky, restless and therefore not very attractive video has turned into a somewhat blurry but very calm video. A few more tips at the end: While working with the Deshaker plug-in, I noticed that even jerky pans were somehow "smoothed", so they came across cleaner and more evenly than without processing by the plug-in. That's why I even edited some of the shots I shot with a tripod, just to make the pan more smoothed. And for the future I've learned to switch off my pseudo 16:9 mode in the camera during recording and always record the full 4:3 picture, because I can still add black bars to the video afterwards. The advantage: you don't have to zoom in quite so far after image stabilization to get rid of the black, dancing edge, since you can simply cover it up with the 16:9 bars, at least vertically. |
||||
|
|
||||
| Back to selection | ||||
|
|||||||||||||||
|
|
|||||||||||||||